Hi, I’m Jen, creator of the Noting Grace DIY design blog, and I love Romabio products. It’s cozy time and if you have been staring at your fireplace and realizing it needs an update, then here are 3 simple ways to bring new life with a unique look to your home.
We fell in love with Romabio a few years back when we first lime washed our Tennessee home. And moving soon after that, we lime washed our Alabama home as well.
I have tried them all – from Classico Limewash to Interior Paints – and have found the products Romabio offers to be very DIY-friendly and distinctly beautiful.
Today, I wanted to share three of my favorite ways to give a dated fireplace a new look.
 Classico Limewash for Farmhouse Chic
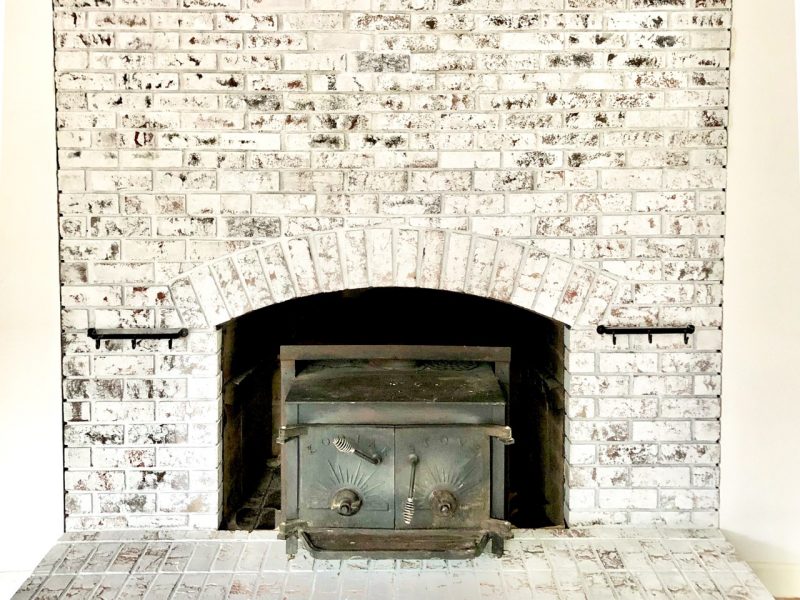
Hands down, this is truly the most dramatic transformation that will make your fireplace the showstopper of the room. It gives you the artistic ability to create just as much brick exposure as you want.
Romabio Classico Limewash is not a typical paint. It’s a mineral based product made from authentic slaked and aged lime sourced from the Dolomite mountains in Northern Italy – the same place where Venetian Plaster comes from. It’s sold concentrated so you dilute it 50-70% with water. It goes on semi-transparent but then dries lighter than it looks when it’s wet. It calcifies to the brick becoming like the rock itself.
But the amazing thing about Classico Limewash is the ability to distress the brick immediately after application to create a unique look. This is where your creative side comes in and you decide how much brick you want to show.
For an interior fireplace, simply dampen your brick or stone fireplace and then apply Classico Limewash. To distress, use a spray bottle and sponges or rags to create the look you want. It can all be complete in one day! Here is a great tutorial video for more application tips.
Masonry Flat for Modern Simplicity
Even though I wanted to lime wash our fireplace when we moved into our current home and create that beautiful weathered patina, I wasn’t able to since the fireplace had been previously painted in latex paint.
Instead, we gave our ugly painted brick fireplace an update using Romabio MicroGrip Primer and a top coat of Masonry Flat.
We first applied the MicroGrip Primer to the acrylic or latex painted brick. Because all of the Romabio paints are mineral based they are breathable and have different qualities than acrylic which seals the surface. If the brick was unpainted, unsealed, and absorbent, I wouldn’t have had to add a primer coat, but since it was I had to add a mineral primer to create a bridge between the acrylic surface and the new breathable, mineral paint.
It was a stunning finish, that took the plastic sheen from a dated latex paint application and transformed it into a beautiful flat finish. I loved it so much that I did the same application in our sunroom.
Application is easy and even with the extra step of the primer, we painted the fireplace in a couple of days. You have to dilute all of Romabio products so be sure to check the back label instructions when applying.
Lime Slurry for Drama and Texture
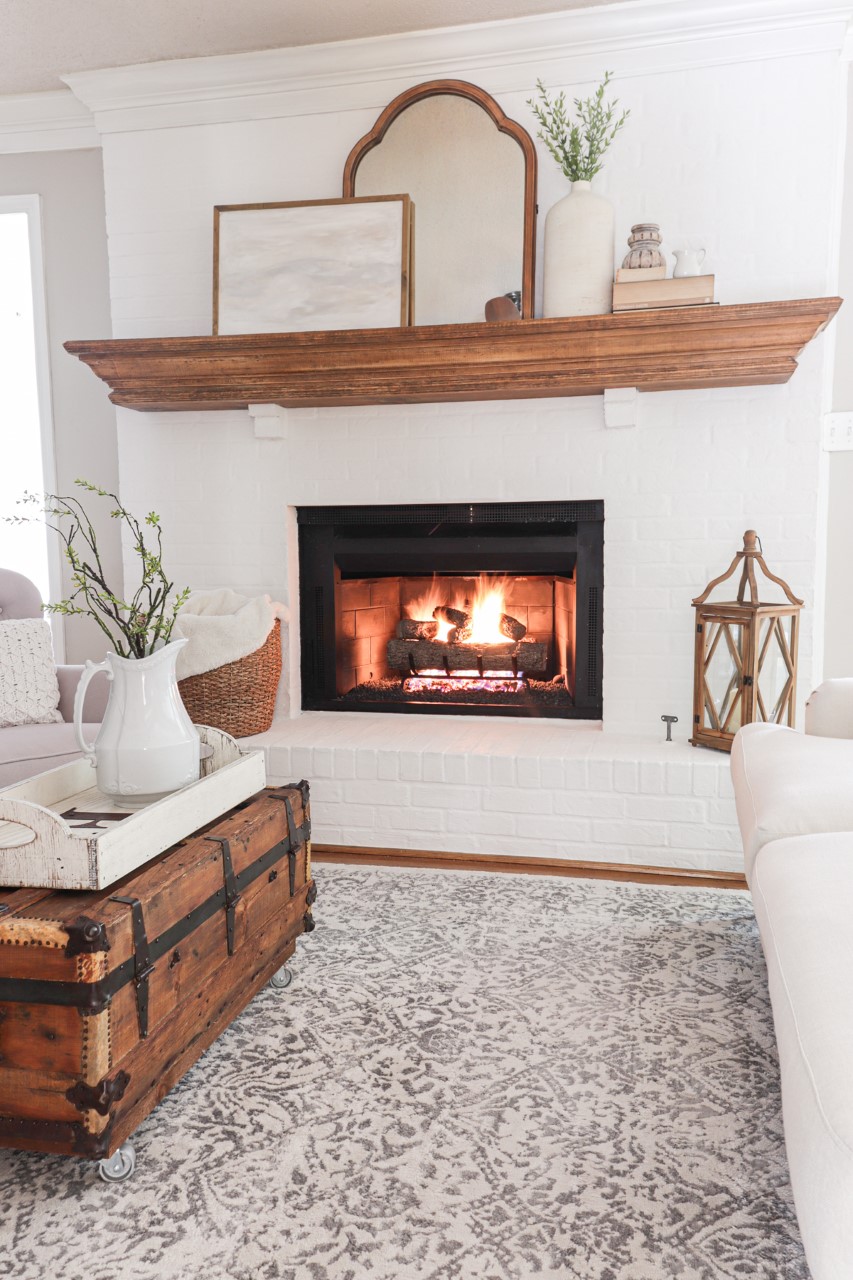
I loved the look of my painted fireplace in Masonry Flat, but I couldn’t get past the ugly divots and worm markings in the brick on our fireplace. (Note that the full fireplace image is the main image at the top of this post).
So when Romabio came out with their Lime Slurry product – I knew I had found the solution for my fireplace.
Romabio Lime Slurry is a textured Italian lime paint, almost like a plaster, and is similar to the Classico Limewash in that it is made from authentic Dolomite lime from Northern Italy. It’s for unpainted, unsealed, and absorbent brick, stone, and stucco.
Once applied, it creates this stunning, very flat European finish that you see on those historical buildings in Italy.
I knew this beautiful textured finish would be the perfect solution to hide the markings in my brick that I hated so much and give my fireplace a modern look. Plus, I got to update the color to my perfect white, Grace Note.
Lime Slurry is the latest trend that is here to stay and I am so excited to show you how to lime slurry a brick fireplace in just one weekend!
How to Lime Slurry a Brick Fireplace
Preparation:
If you are starting with an absorbent, unpainted brick wall, then the only prep needed is cleaning the brick. Make sure to remove any dust, dirt, or fireplace soot from the brick.
For painted brick or brick that isn’t absorbent, then you will need to apply one coat of Romabio MicroGrip Primer. This will allow the Lime Slurry to adhere.
To check if your brick is absorbent, perform a simple water test. Take a spray bottle filled with water and spray it onto the brick. You could also splash a tiny amount from a glass. After a few moments, see if the water is soaking into the brick. If so, then you can apply Romabio directly to the brick. If it beads up, similar to tile, then you will need to apply the MicroGrip Primer.
Since we previously painted our fireplace with Romabio Masonry Flat, no prep was needed because there was already a breathable coating on the brick. It would be the same if you have previously applied Classico Limewash.
It’s a good idea to move any furniture out of the way and cover your floors with drop cloths. We also masked off our fireplace since we had already painted the firebox black.
After we completed filling in our mortar lines, one optional step that we chose to do was apply Romabio Marmorino GF.
It is a flat, larger grain plaster made from authentic slaked lime and is typically used for exterior and interior stucco finishes.
Remember, we wanted to fill in all those divots and worm marks in our brick so Marmorino GF was perfect. If you have deep mortars or want a thicker application, you might want to use it as a pre-coat as well.
After we made the brick mortar joints flush, we allowed the mortar to cure overnight. The next morning, I focused only on those divots and applied the Marmorino GF to those spots, filling in those ugly spots.
Again, this is an optional step. But in the picture above, you can immediately see the difference in the top of the brick fireplace where I applied a coat of the Marmorino GF and the lower brick that only had the mortar lines filled.
It was so fun watching the transformation slowly take place with each step.
Once we filled all the divots in the brick, we allowed this to dry 24 hours before applying the first coat of Lime Slurry.
Applying Romabio Lime Slurry
To begin, you want to add a very small amount of water to the slurry. This product comes in concentrate, so dilution is necessary.
I would scoop out a little bit and add a small amount of water and mix thoroughly.
You want the slurry viscosity to be thick, but also workable. Think about the texture of a frosty.
Now, this type of material is different from traditional paint. There is a slight aggregate to the lime slurry creating a stucco-type look.
The first step in application is wetting the surface. It doesn’t need to be soaked, but damp enough for the product to set properly.
You don’t want to apply a thick layer to begin with. The thicker the product, the more difficult it is to dry which may result in cracking.
Make sure you apply the lime slurry in a horizontal pattern. You want the top of the bricks to appear smooth and uniform.
It’s best to apply a thin layer in multiple coats until you get the look you want. And with each new coat, make sure the first layer is fully dried. We waited overnight between coats.
The number of coats depends on the final look you want.
Here is what our brick looked like after the first coat of our Lime Slurry application.
All the divot marks and worm lines have disappeared!
However, after this first coat, it was still a bit too textured for me, so we decided to apply a second coat.
Now I know that sounds counter-intuitive to add more texture to create a smoother finish. But if you think about the texture in the slurry filling in those tiny holes, it makes sense.
Here’s how it looks after the second coat.
The end result is a brick finish that mimics the look of lime plaster creating a full coverage of the masonry surface you are applying it to.
Optional Step for Extra Protection: Romabio Mineral Shield
Along with Lime Slurry, Romabio has introduced two new products, an Algae and Moss Cleaner (exterior only) and Mineral Shield (interior/exterior), which water and stain proofs your painted brick reducing the chalking effect.
As the can says, it’s an invisible top coat. And there are many benefits to applying this over mineral based paints or other porous masonry surfaces, especially for outdoors where rain and water are prevalent.
But one thing to note is that when lime based products are applied, there is the possibility of chalking. Meaning when you rub up against it, a tiny residue may wipe off.
Mineral Shield stops that chalking from happening.
The last part of this fireplace makeover will be new gas logs installed in the firebox, and I know people will want to sit on the hearth when the fire is lit.
And I didn’t want anyone getting up with a chalky bum after warming themselves in front of the fire.
So we opted for this last step to ensure our finish doesn’t begin chalking and continues to look beautiful!
It’s ready to use right from the can – no need to dilute it.
For our fireplace, Trent brushed it on over the Lime Slurry. So easy!
We also applied some on our exterior and were able to use a garden sprayer and the application was so simple!
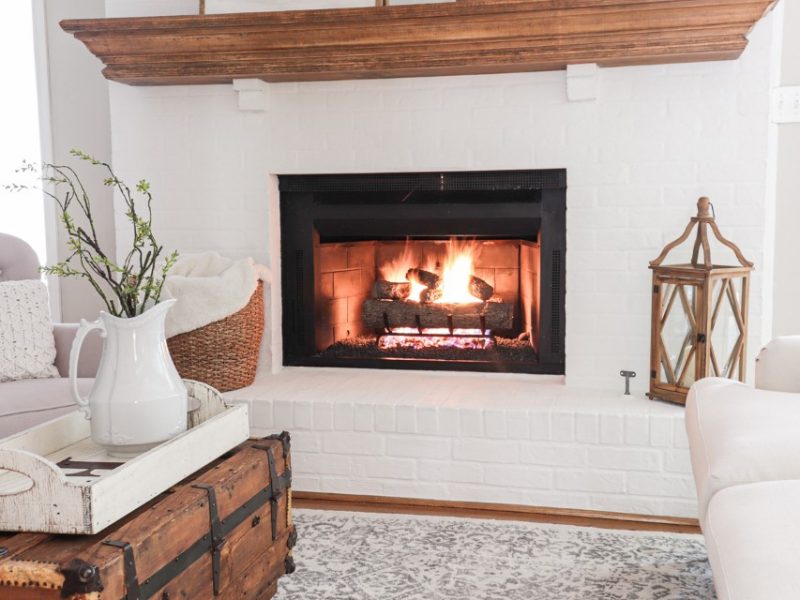
Here’s how the fireplace looks once the Mineral Shield has dried.

It’s completely invisible and doesn’t change the color or sheen of the surface.
It’s fresh and new and looks like the European farmhouse fireplace of my dreams!


 Photo Credit: Caldwell House, TN